Camera Basic Controls
Mode Dial to Shutter
"There are too many letters on the mode dial and I have no idea what to use" — let's start there. You don't need M mode from day one. Learn one step at a time.
First: How to Hold Your Camera
Camera shake is the most common cause of blurry photos. Just changing how you hold it can make a noticeable difference.
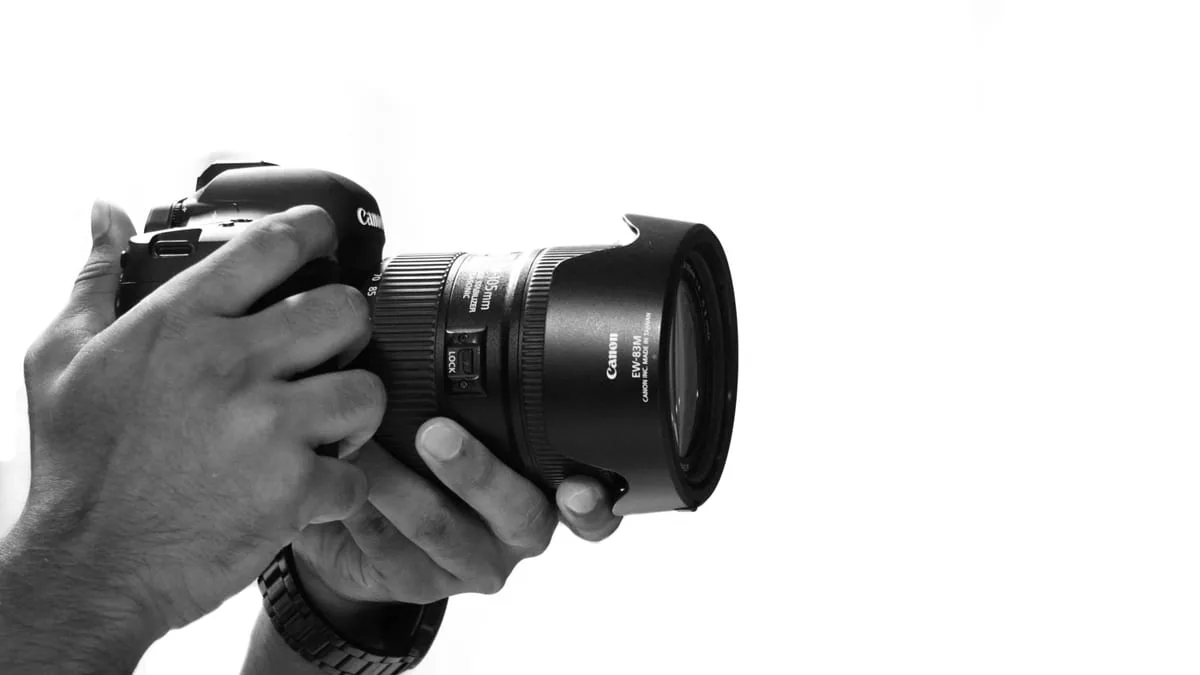
- 1Wrap your right hand firmly around the grip with your whole palm
- 2Support the lens from below with your left hand to bear the camera's weight
- 3Pull your elbows in toward your body to minimize shake
- 4When using the viewfinder, press the camera against your forehead
- 5Release the shutter when you've exhaled halfway
Watch out for smartphone habits: Holding the camera with one hand like a phone causes shake with a 1–2 kg camera + lens. Use both hands and keep your elbows against your body.
Mode Dial — Just 5 Modes
Every camera has a busy-looking dial, but in practice you only need 5 modes. Start with P → A (Av) in that order.
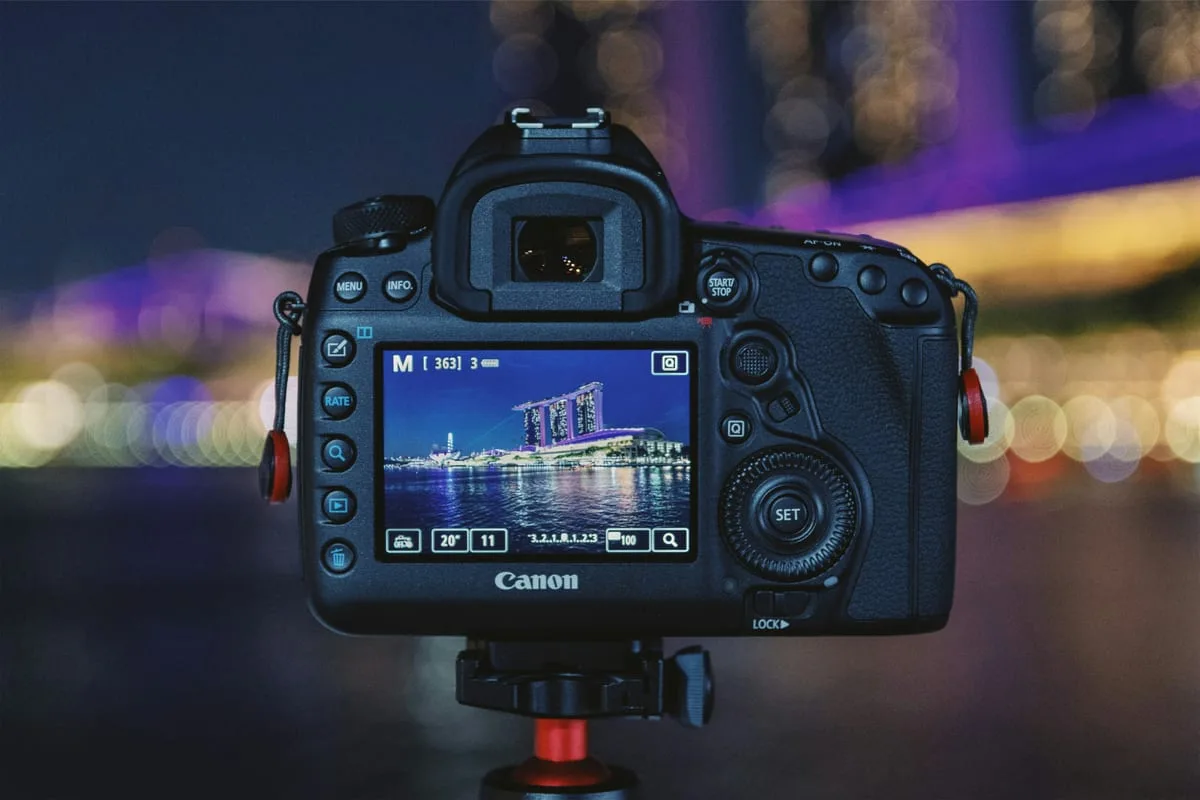
Check the current mode and settings in real time on the LCD screen
Full Auto
BeginnerAuto: Shutter, aperture, ISO, white balance — all automatic
When: When you first turn the camera on. But graduate from this within a week.
Program Auto
Beginner ★Auto: Shutter and aperture auto, I set ISO and white balance
When: When you need to shoot quickly. Let the camera handle exposure; just adjust ISO.
Aperture Priority
Intermediate ★Auto: I set aperture only → shutter speed automatic
When: Portrait and bokeh shots. Open to f/1.8 to blur the background.
Shutter Priority
IntermediateAuto: I set shutter speed only → aperture automatic
When: Running people or sports. Fix at 1/500s+ to freeze movement.
Full Manual
AdvancedAuto: None — everything is manual
When: Studio, long-exposure night shots, film aesthetics. The most powerful once you're comfortable.
Recommended learning order: AUTO (1 week) → P mode (2–4 weeks) → A/Av mode (1–3 months) → M mode (after). Skipping steps makes it hard to understand why a shot turned out the way it did.
Half-Press Shutter — The Most Important Habit
Don't press the shutter all the way down in one go. Half-press → confirm focus and exposure lock → press fully. That sequence is everything.
Half-press
Press the shutter halfway. The camera automatically locks focus and calculates exposure.
Confirm
When the focus point turns green in the viewfinder or LCD, focus is locked.
Press fully
Push the finger further to shoot. You can slightly reframe during this — focus stays locked.
Focus Lock tip: When your subject isn't in the center of the frame, point the center at your subject, half-press to lock focus, then reframe. This is the Focus Lock technique.
First 3 Settings to Touch
The menu looks intimidating, but all you need to check at first are these 3 things. Leave everything else on default.
Image Quality
Start with JPEG Fine. Switch to RAW once you learn post-processing.
Lowering quality saves space but leaves no room for editing later.
AF Mode
Half-press to lock focus and hold. Suitable for stationary subjects.
For moving subjects (kids, pets), switch to Continuous AF (AF-C / AI Servo).
White Balance
Accurate in most situations. Adjust to K value later when going for film aesthetics.
If skin tones look off under fluorescent lights, switch to the 'Fluorescent' preset.
expand_circle_downWant to know more — M mode, Histogram, ISO noiseIntermediate+
What changes when you use M mode?
You set shutter speed, aperture, and ISO all manually. You can intentionally over- or under-expose beyond what the camera thinks is correct. Essential for studio lighting, long-exposure night shots, and film aesthetics. Start by watching the exposure meter (the bar at the bottom) and trying to hit 0.
What is a histogram?
A graph showing the brightness distribution of your photo. Shifted left = underexposed; shifted right = overexposed. The LCD can look different depending on ambient light, so the histogram gives a more accurate read.
How high can you push ISO?
It depends on sensor size. Generally, APS-C mirrorless cameras can handle up to ISO 3200 cleanly for print and social media. ISO 6400–12800 is acceptable for web use. Beyond that, noise reduction software (Lightroom Denoise, Topaz) is recommended.
TRY THIS TODAY
Shoot 10 photos of the same subject in P mode
Check: Out of 10 shots, identify which ones are in focus and which are blurry. Blurry shots are usually caused by skipping the half-press or camera shake.
BeginCAMERA
Analyze your shot with AI
What mode was used? What was the shutter speed? — AI estimates your camera settings from the photo. Compare AI estimates with your actual settings to learn faster.
add_a_photoAnalyze PhotoUp Next
Gear recommendations by budget and genre
NEXT
STEP 03 · Exposure Triangle
Last updated: April 2025 · Settings may vary by camera model
Photos: Unsplash (CC0) — Rene Schubert, Lisanto, Megat Irfan